(Adding categories) |
No edit summary |
||
| (19 intermediate revisions by 12 users not shown) | |||
| Line 1: | Line 1: | ||
| + | {{GameVersion |
||
| + | |type = original |
||
| + | |original = Rebel Transport |
||
| + | |reboot = GR-75 Medium Transport}} |
||
{{RebelShip |
{{RebelShip |
||
| image=[[File:GR-75 Medium Transport.png|300px]] |
| image=[[File:GR-75 Medium Transport.png|300px]] |
||
| − | | name= |
+ | | name=GR-75 Medium Transport ''(Rebel Transport Frigate)'' |
| type=Frigate |
| type=Frigate |
||
| − | | aff=[[Rebel Alliance]] |
+ | | aff=[[Rebel Alliance/Original|Rebel Alliance]] |
| complement= |
| complement= |
||
| systems=Frigate Defence |
| systems=Frigate Defence |
||
| crew= |
| crew= |
||
}} |
}} |
||
| + | The '''GR-75 Medium Transports''', or '''Rebel Transports''' as they are more commonly known, were used during the evacuation of Hoth. They were acquired quite cheaply and lack any sort of standard armament. In ''[[Star Wars: Battlefront II]]'', they are used as stationary ships on the [[Hoth/Original|Hoth]] [[Hunt]] and [[1-Flag Capture the Flag|CTF]] map. |
||
| − | + | The frigate is either armed with auto turrets or no turrets at all. Docking and spawning at this frigate is impossible, as it serves as a support ship and thus cannot be entered or controlled, but fires automatically and may be destroyed. One of these frigates are always near a capital ship in ''Star Wars: Battlefront II'' Space Combat maps. |
|
==Attacks== |
==Attacks== |
||
| Line 15: | Line 20: | ||
==Trivia== |
==Trivia== |
||
| − | *The actual GR-75 is a |
+ | *The actual GR-75 is a Transport Ship and not a Frigate, though it is classified as one in ''Star Wars: Battlefront II''. |
| − | *The GR- |
+ | *The GR-75 is a [[Space Hoth]] variation of the [[Corellian Corvette|Rebel Frigate]]. |
| + | *While playing on the Hoth Hunt or CTF map, if the "one shot kill" cheat is enabled, these transports may be destroyed. |
||
==Gallery== |
==Gallery== |
||
| − | <gallery captionalign=" |
+ | <gallery captionalign="center"> |
GR-75.jpg|A Rebel Transport. |
GR-75.jpg|A Rebel Transport. |
||
| + | GR75 Transport.jpg|Rebel Transport Schematics. |
||
</gallery> |
</gallery> |
||
| Line 32: | Line 39: | ||
[[Category:Frigate]] |
[[Category:Frigate]] |
||
[[Category:Galactic Civil War era]] |
[[Category:Galactic Civil War era]] |
||
| − | [[Category: |
+ | [[Category:Star Wars: Battlefront II]] |
| − | [[Category:Space]] |
||
Latest revision as of 02:39, 12 January 2020
| |
|
| GR-75 Medium Transport (Rebel Transport Frigate) | |
| |
| Basic Info | |
| Type: |
Frigate |
| Affiliation: | |
| Unit Details | |
| Systems: |
Frigate Defence |
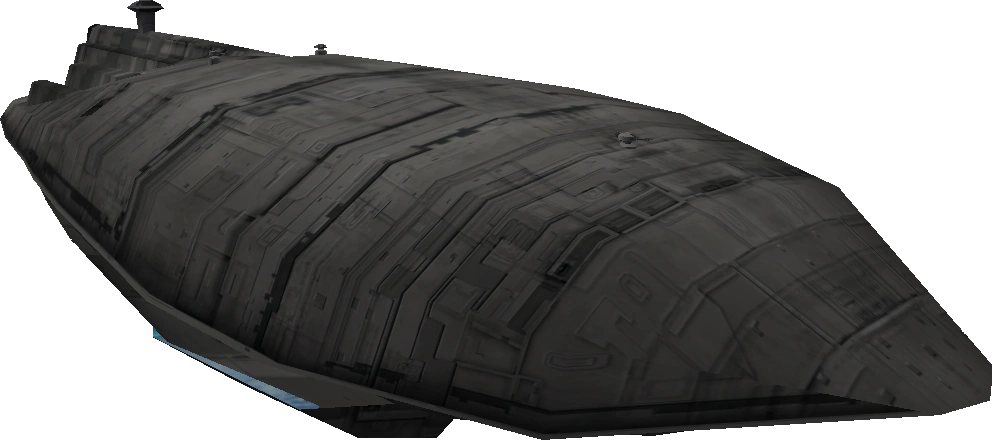
The GR-75 Medium Transports, or Rebel Transports as they are more commonly known, were used during the evacuation of Hoth. They were acquired quite cheaply and lack any sort of standard armament. In Star Wars: Battlefront II, they are used as stationary ships on the Hoth Hunt and CTF map.
The frigate is either armed with auto turrets or no turrets at all. Docking and spawning at this frigate is impossible, as it serves as a support ship and thus cannot be entered or controlled, but fires automatically and may be destroyed. One of these frigates are always near a capital ship in Star Wars: Battlefront II Space Combat maps.
Attacks[]
Trivia[]
- The actual GR-75 is a Transport Ship and not a Frigate, though it is classified as one in Star Wars: Battlefront II.
- The GR-75 is a Space Hoth variation of the Rebel Frigate.
- While playing on the Hoth Hunt or CTF map, if the "one shot kill" cheat is enabled, these transports may be destroyed.
Gallery[]
")
A Rebel Transport.
")
Rebel Transport Schematics.
Links[]
- Back to Vehicles
| Rebel Units | Rebel Soldier · Rebel Vanguard · Rebel Marksman · Rebel Smuggler · Bothan Spy · Wookiee Warrior · | |
| Land Vehicles | Alliance AAC-1 · Rebel Combat Landspeeder · T4-B Heavy Tank · Snowspeeder · 74-Z Speeder Bike | |
| Space Vehicles | X-Wing · Y-Wing · A-Wing · Alliance Assault Craft · B-Wing · Millennium Falcon · Corellian Corvette · Rebel Transport · Nebulon B-class Frigate · Mon Calamari Star Cruiser · Home One | |