m (add c. modes) |
No edit summary |
||
| (41 intermediate revisions by 21 users not shown) | |||
| Line 1: | Line 1: | ||
| + | [[Image:Tantive IV Picture.JPG|500px|Tantive IV|right|200px]]'''Tantive IV''' is a diplomatic [[Corellian Corvette]] used by Alderaanian Princess Leia Organa. The ship would eventually be captured and destroyed by Imperial forces in an attempt to find the Death Star plans. This is one of the only two maps in Battlefront 2 that's considered a ground map, but isn't an actual planet. |
||
| ⚫ | |||
| + | ==Description== |
||
| − | Tantive IV is a starship that appears in the films only a couple of times. The first is the end of Episode III: Revenge of the Sith, when [[Obi-Wan]] boards the ship to meet up with [[Yoda]] after the clones turn against the Jedi. It is also the first location we see in Episode IV: A New Hope, when the men are trying to keep Imperial forces out of the ship. [[Princess Leia]] sends a pod from the ship carrying C3PO and R2-D2 to Tattoine, and is soon siezed by the troops of [[Darth Vader]]. These are pretty much the only parts played by the ship in the films. Recognizable features include the hallway where Imperial troops break into the ship and the corridors where [[Princess Leia]] puts the droids into the escape pod. Close quarters and short hallways make this map a breeding ground for close-range combat. |
||
| ⚫ | |||
| + | The map features many key section of the ship, including the bridge, escape pod bay, and the reactor room, all connected by a network of corridors. Some of these are iconic areas in Episode 4, such as the room where Leia gives R2-D2 the plans, the corridor where the Imperials boarded, the escape pod bay where the droids escaped, and a little inlet that represented the interior of a TIE boarding shuttle. |
||
==Heroes== |
==Heroes== |
||
| − | *[[General Grievous]]- [[CIS]] |
+ | *[[General Grievous/Original|General Grievous]] - [[Confederacy of Independent Systems|CIS]] |
| − | *[[Princess Leia]]- [[Rebel Alliance]] |
+ | *[[Princess Leia]] - [[Rebel Alliance/Original|Rebel Alliance]] |
| − | *[[Darth Vader]]- [[Empire]] |
+ | *[[Darth Vader/Original|Darth Vader]] - [[Galactic Empire/Original|Empire]] |
| − | *[[Yoda]] - [[Republic]] |
+ | *[[Yoda/Original|Yoda]] - [[Galactic Republic/Original|Republic]] |
==[[Combat Modes]]== |
==[[Combat Modes]]== |
||
*[[Conquest]] |
*[[Conquest]] |
||
| − | *[[1-Flag CTF]] |
+ | *[[1-Flag Capture the Flag|1-Flag CTF]] |
| + | ==Strategies== |
||
| + | In the small hallways of the map, there are many different weapons you can use to win the battle by taking advantage of the multiple chokepoints. |
||
| + | *'''[[Grenade]]s:''' since this is a close-quarters map, grenades are a must on this map. The best place to use these is in small, tight-spaced corridors. Make sure that none of your allies are near the enemy when grenade is thrown, or else they will get killed. |
||
| + | *'''[[Auto Turret]]s:'''<span style="line-height:21px;"> They can slow down the enemy on the narrow corridor, but not always stop them.</span> |
||
| + | *'''[[Z-6 Chaingun|Chainguns]]:'''<span style="line-height:21px;"> These fast repeating blaster can mow down clumps of enemy.</span> |
||
| + | *'''[[Mine]]s:''' These explosives are great for placing near the blast-door connected to the enemy base. |
||
| + | *'''[[Detpack]]s:'''<span style="line-height:21px;"> These remote explosive are perfect for ambushes in a chokepoint.</span> |
||
| + | The engineers are very important in the battle. Their shotgun can cause damage to the enemy as the fusion cutter can repair the ammo and health droids which have been destroyed by grenades. |
||
==Links== |
==Links== |
||
| Line 17: | Line 27: | ||
*[[Strategies: Tantive IV|Strategies]] |
*[[Strategies: Tantive IV|Strategies]] |
||
*[[Glitches: Tantive IV|Glitches]] |
*[[Glitches: Tantive IV|Glitches]] |
||
| + | |||
| + | {{SWBF2 Maps}} |
||
| + | [[Category:Maps]] |
||
| + | [[Category:Battlefront II Maps]] |
||
| + | [[Category:Clone Wars Era]] |
||
| + | [[Category:Galactic Civil War era]] |
||
| + | [[Category:Star Wars: Battlefront II]] |
||
Revision as of 22:56, 10 February 2020
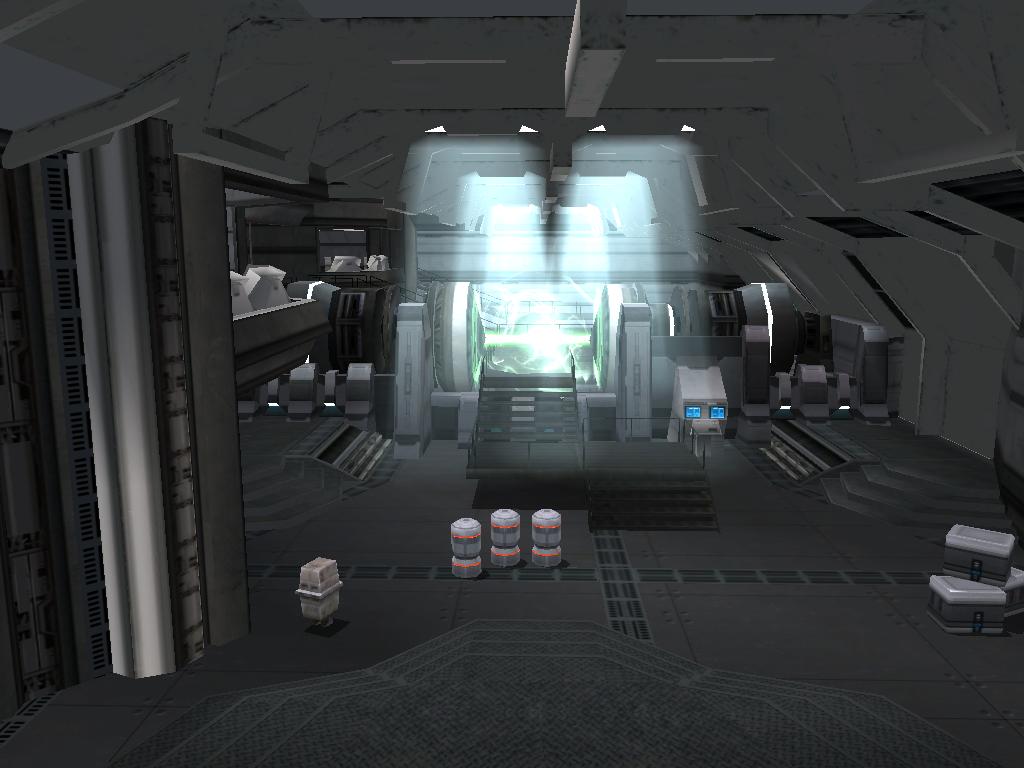
Tantive IV is a diplomatic Corellian Corvette used by Alderaanian Princess Leia Organa. The ship would eventually be captured and destroyed by Imperial forces in an attempt to find the Death Star plans. This is one of the only two maps in Battlefront 2 that's considered a ground map, but isn't an actual planet.
Description
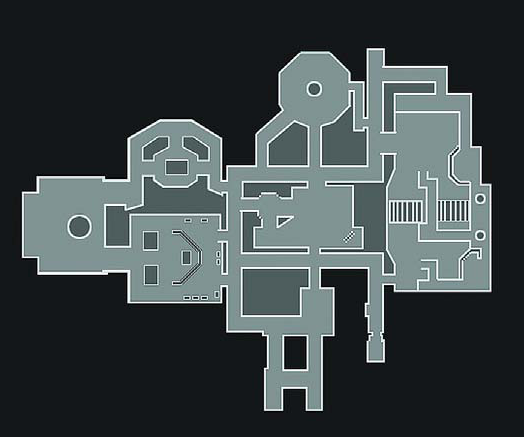
The map features many key section of the ship, including the bridge, escape pod bay, and the reactor room, all connected by a network of corridors. Some of these are iconic areas in Episode 4, such as the room where Leia gives R2-D2 the plans, the corridor where the Imperials boarded, the escape pod bay where the droids escaped, and a little inlet that represented the interior of a TIE boarding shuttle.
Heroes
Combat Modes
Strategies
In the small hallways of the map, there are many different weapons you can use to win the battle by taking advantage of the multiple chokepoints.
- Grenades: since this is a close-quarters map, grenades are a must on this map. The best place to use these is in small, tight-spaced corridors. Make sure that none of your allies are near the enemy when grenade is thrown, or else they will get killed.
- Auto Turrets: They can slow down the enemy on the narrow corridor, but not always stop them.
- Chainguns: These fast repeating blaster can mow down clumps of enemy.
- Mines: These explosives are great for placing near the blast-door connected to the enemy base.
- Detpacks: These remote explosive are perfect for ambushes in a chokepoint.
The engineers are very important in the battle. Their shotgun can cause damage to the enemy as the fusion cutter can repair the ammo and health droids which have been destroyed by grenades.
Links
- Back to Maps
- Strategies
- Glitches
| Maps of Star Wars: Battlefront II | ||
|---|---|---|
| Land Maps | Coruscant: Jedi Temple · Dagobah: Swamp · Death Star: Interior · | |
| Space Maps | Coruscant** · Dagobah* · Endor* · Felucia · Geonosis* · Hoth · Kamino* · Kashyyyk · Mustafar** · Mygeeto · Naboo* · Polis Massa* · Tatooine · Utapau* · Yavin
* = Galactic Conquest only; ** = GC and Campaign only. | |
| X-Box Live DLC Maps | Bespin: Cloud City · Rhen Var: Citadel · Rhen Var: Harbour · Yavin 4: Arena | |